
......continuing the paper making process.....
 Fiskars manufacturers these helpful texture plates.....look for those that have fairly deep indentions at your favorite craft store.
 Option #1. Here Nancy cuts a sheet of 'Rinse Away', the size of one of her textured plates. (Note the plastic doilies in the background....which make wonderful paper molds.)
The 'Rinse Away' is sprayed with water until wet. Work on a tray with a lip to catch the excess water.
 A firm stencil brush is a good tool to press the wet stabilizer into the textured surface.
 Now the water needs to be removed....Nancy suggested beginning by pressing lightly with a paper towel and then a sponge. You'll want to remove as much moisture as possible to shorten the drying time. We put our projects outside in the sun where they finished drying in no time.
 Instead of retaining straight cut edges, Nancy suggests pulling the fibers away (use your fingers, a spork, or the handle of an old tooth brush) to deckle the edges.
Here's two of the stamps I brought to use as molds.
 A small brayer roller is another good tool that can be used to press the wet stabilizer into the grooves of one's base.
 Option #2. Tear the Rinse Away into small pieces and arrange on a mold. Overlapping will provide firmer results while leaving small spaces between some pieces will create interesting lace like holes.
 Spray with water to wet. It isn't necessary to utilize the entire design.....choose just parts of it if you prefer. Use firm pressure to press the wet stabilizer into the grooves.
 Begin removing the excess water by lightly dabbing with a paper towel, followed by a sponge and then let dry completely.
 Option #3. Prior to our gathering, Nancy had us cut a section of Rinse Away into small pieces (a rotary cutter worked efficiently) and place in a jar, filled with HOT water to cover. Mine sat for 24 hours before our meeting.....shaking from time to time, the stabilizer dissolved into mushy pulp.
 Using a plastic 'spork' (a cross between a fork and spoon), the pulp is scooped out of the jar and positioned onto a mold. Any excess water/pulp that spills onto the tray can be poured back into the jar and reused. This pulp has a long shelf life....just keep adding hot water and small pieces of Rinse Away to keep the fun going!
 The pulp can be arranged in a thick or thin layer....the more you put on, the sturdier the paper will become. After pressing the pulp into the design, remove the excess water as before, taking care that the pulp isn't picked up during this process.
Here's a wood cut block......look at this wonderful design!
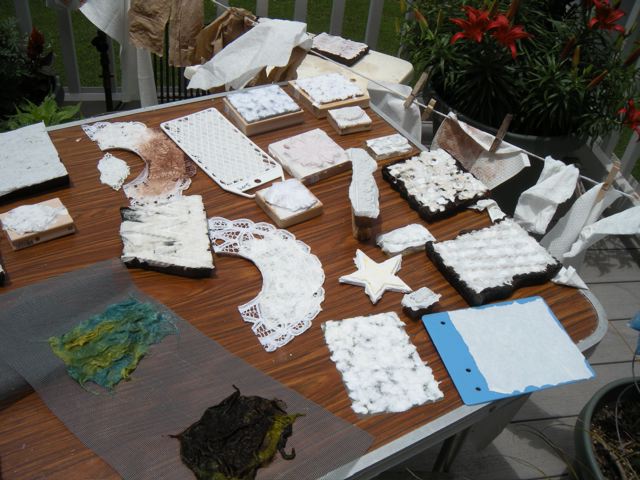 Our paper is drying in the sun.....note....we used a clothes line to dry the paper towels which were reused as each of us churned out more paper. After the paper is totally dry, we used the tip of a scissors or pin to loosen an edge of the paper from it's form, then carefully peeled it off....taking great care not to tear it. The fun continued as we painted our designs....
Each of us were like giddy kids as Nancy guided us through the 3 options she uses to make embossed paper...... You might want to give it a try yourself!
2 comments:
Quite interesting. I would have thought the "Rinse Away" would dissolve completely. Very cool that it leaves fibers behind.
Amazing what you can do with what you have! very interesting post!! Thanks so much for sharing!
Post a Comment