Showing posts with label Wool projects. Show all posts

Friday, October 16, 2015

CREATING MY OWN FALL COLOR

My project list has been stalled lately...but now I'm back on track.  Here's how I'm spending my evenings.

 This felted wool fabric has been dyed, shibori painted, ice-microwave dyed, and in a final attempt to turn it into a usable piece of fabric.....it was mono-printed and now I'm a happy camper.  (I used the other half of this piece here.)

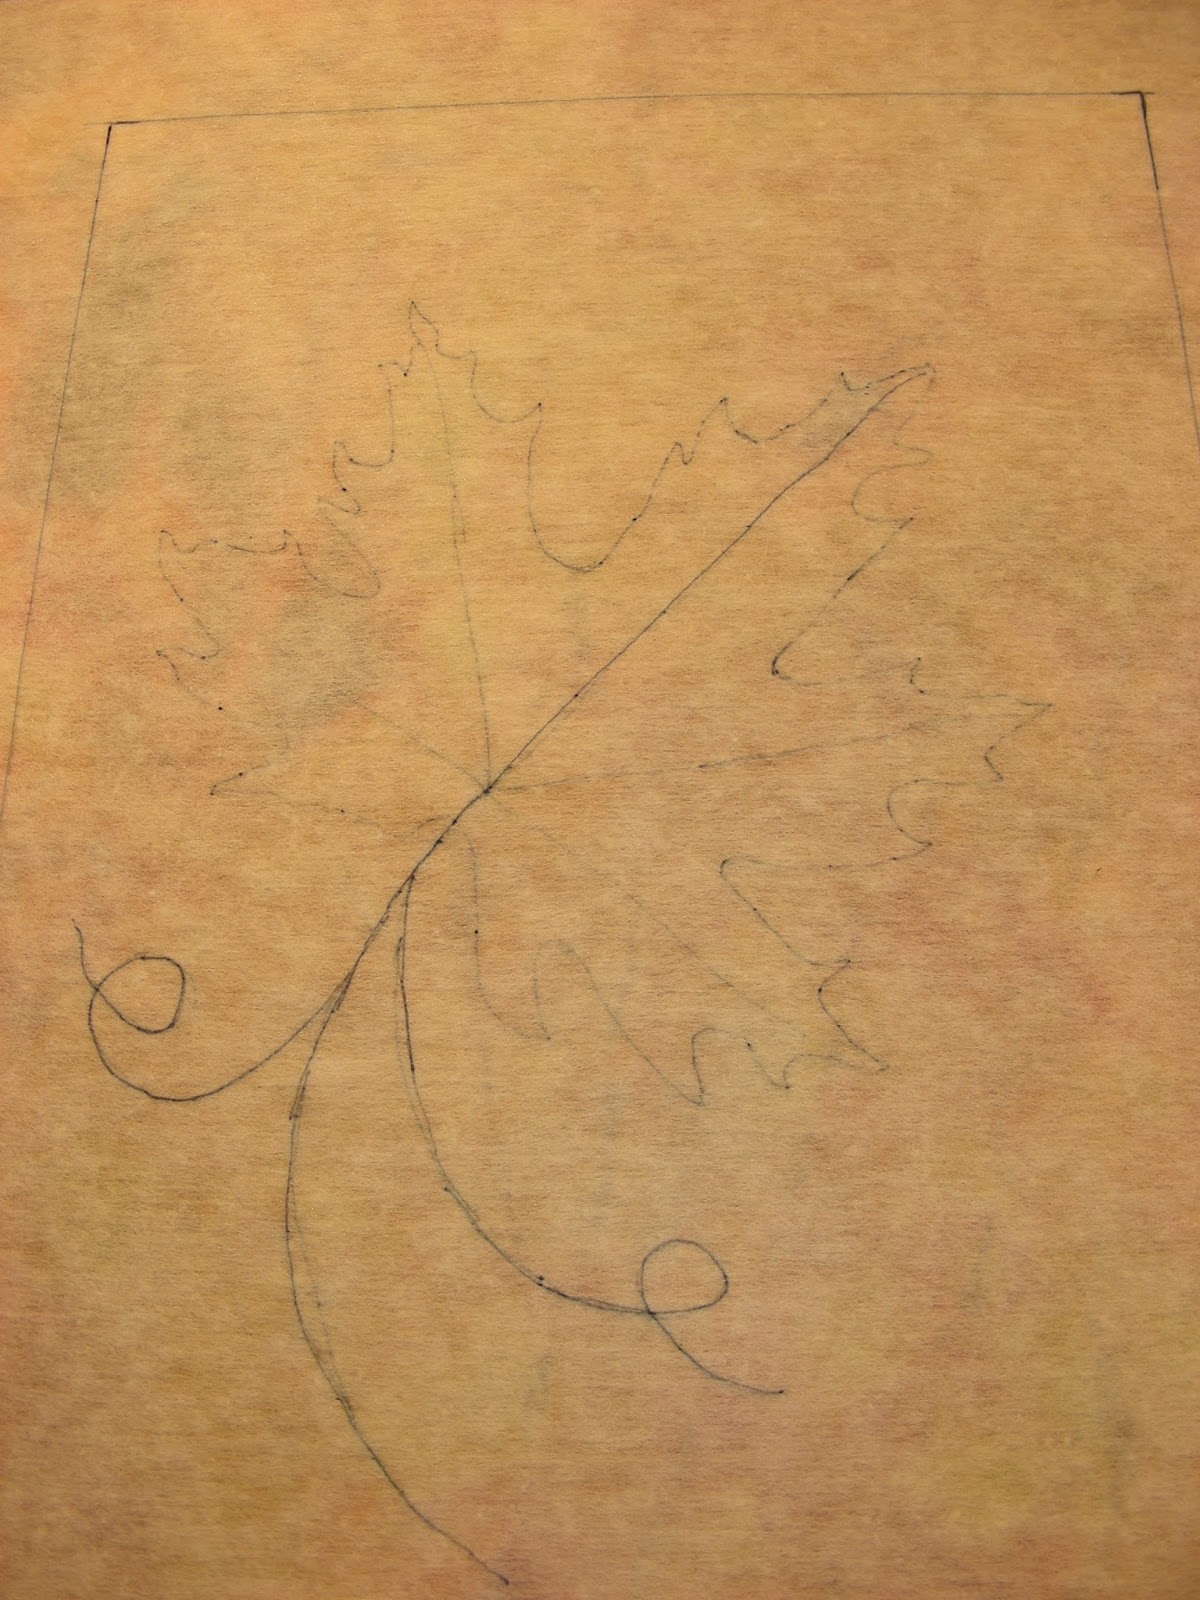
It screamed fall to me.....so I've gathered beads and set out to create a maple leaf.
 Marking this type of fabric is very problematic....but I figured out a solution for projects like this a long time ago.  The design is sketched onto a piece of Pellon non-fusible interfacing which I always use anyway as a stablizer when beading.(it's white but looks tan in this photo...sorry about that)
 I'm not a fan of spray basting but do utilize it for this step.....by lightly spraying the wrong side of the fabric to secure the interfacing.  Next, using an open toe embroidery foot...and contrasting thread in the bobbin.....the design lines are stitched.
 ........Which are visible on the right side.  Not quite so much in this photo but well enough for me to see when I'm beading.
 I ALWAYS secure my work in a Q-snap frame for beading.....and use a portable cutting/pressing board to help support. My work station for evening stitching is a denim couch and all too often accompanied by a large black lab!!
The veins are finished and the tedious (yet enjoyable for me) task of securing seed beads onto the felted wool has begun. Getting the right angle of the lines has been a challenge, causing more removal than I would like but I think I'm now on the right track.

I'm linking to:  Nina-Marie's Off The Wall Friday, Sarah's Whoop, Whoop Friday, Crazy Mom Sews, and Richard and Tanya Quilts.  

Friday, May 23, 2014

ZIPPY FLOWERS - NUNO FELTED WALL QUILT

Yeah....it's Friday.....though honestly, almost every day is the same to me since I don't work a 9 to 5 job!  Here's what I have to share this week.
 After gathering the supplies to embellish a nuno felted piece....a bunch of previously purchased zippers caught my eye.  I blogged about them here  and also here.
 Here's how it looked with just the flower zippers in place.  Notice...I was working horizontally....

So.....after adding more embroidery and lots of beads, somehow the direction of the quilt changed to vertical.  But....it still needed something......
To attach a backing (which presents a tidier appearance to the buyer, not to mention it hides and protects all the threads), I normally blanket stitch the layers together along the outside edge OR use my very favorite method - a beaded edging technique.  I transferred many of the techniques I'd previous developed for edgings on garments to my quilts in about 2000.  You can find how to do most of them yourself in my various books published after 2001. 

So......you guessed it......I added seed beads for the final touch to frame the piece.  It's getting to the point where I'm not sure whether a piece REALLY needs them or if it's so natural to add beads that a piece looks naked without them!?!?

For now this piece is back to its working horizontal orientation. It's puzzling to me why I have these last minute dilemmas over which way to display a piece.  But to be safe, I'll add 4 corner (hanging) triangles to provide options for whoever gives this piece a home.

ZIPPY FLOWERS  14" X 10"
Artist Nuno Felted wool, hand embroidered, bead embellished, and featuring zipper flowers.


Visit these inspiring links to see what fellow artists have been up to this week:
Nina-Marie's Off The Wall Friday,  Crazy Mom,  Sarah's Whoop, Whoop Friday, and Richard and Tanya's A Finish Friday.

Thursday, November 7, 2013

FRAMING

Embellishing with natural materials can be a challenge, not only in regard to the design and execution but displaying can be problematic as well.
After collecting pine needles along my morning walks, spraying with clear lacquer helped preserve them.  Framing the work under glass was the answer for the piece I created with these pieces of nature.  Here's how I did it........

 Once the actual fiber piece was completed, I used tiny hand stitching on the front of the work (large running ones on the back) to attach it to an acid free mat.  Securing all knots very well.  
 To protect and disguise the threads, I 'dry mounted' a piece of handmade paper.  Dry mounting is a process of covering both surfaces (to be attached) with rubber cement.  When each is fully dry, they are pressed together to make a permanent bond.
 Next, I cut clear plastic spacer bars the length and width of the inside of the frame.  The ones I use have a paper covered adhesive strip that when removed, helps to hold them in position.  This allows the work to sit an appropriate distance from the glass. (especially necessary for this type of embellishment)
 A label is added.
And a final protective thin piece of cardboard is added before securing the layers with metal clips.  NOTE....be sure the frame you choose has room for the plastic spacers.  I had to do some adjusting with this metal frame....but opted for it anyway because I wanted the low profile look.  

                                                               click on photo to enlarge
MOUNTAIN PINE NEEDLES   16" X 12"  © 2013
AVAILABLE FOR PURCHASE HERE

 Artist hand-dyed and felted wool, embellished with pine needles, rusted cotton cord, and hand embroidered.  Matted in a low profile black frame.

Due to the glare of the glass.....I found it impossible to get a good quality photo of the piece in its frame.....I'm sure you all can envision it without the visual!

Detail

Tuesday, April 30, 2013

LINES

This post is being written with a bit of apprehension because it's the very last piece from my stack of resist dyed felted wool.  Oh ya....I gotta make more....however this isn't a process that can be easily accomplished without a significant amount of equipment and supplies, which I don't personally own.  (But I plan to!)

It's been so comforting to know when I needed handwork....that within an hour of auditioning beads/threads I could have needle in hand! Naturally, that was only the beginning...a lot of thought and experimenting regarding the surface design was required.  Often that meant a lot starting - stopping - removing - and finally restarting.

Okay, okay.....so for awhile I'll be exploring other ideas, but I will come back to this exciting medium soon.

 Here's the piece before pressing/trimming the edges and stabilizing.

 Now with some embroidery.

 And a little more.....it may be difficult to see the black X's....so check out the detail below.


LINES  12" X 8" © 2013
Artist resist dyed felted wool, hand embroidered and bead embellished.
Ready to hang or frame.

Thursday, April 25, 2013

3-D BEADWORK

Despite an over-committed schedule which should settle down shortly, I have managed to squeeze out some stitching time.  I've been wanting to incorporate into my work, some of the 3-D beading techniques that I've been experimenting with.

 This small, about 7" square, resist dyed felted wool piece seemed like a good starting place!
 Out came the beads and other supplies....
 And the beading began....
....so far...this is what I have.  The circular sections of ruffles will be one of the new techniques I'm featuring in my new 3-D beading workshop.

Stay tuned....I'm hoping I can complete this piece in the next few days....

Sunday, April 7, 2013

STAIRWAY TO HEAVEN

While my sewing machine is still out for repair....I can, guilt free, indulge myself in DVR'd reality TV shows while my hands do the stitching.

I'm down to only 2 more of my hand felted, resist dyed wool pieces.....panic is setting in for sure.  They've been my 'go to' projects inbetween other projects. The design of this piece comes from securing old fashioned metal hair clips and narrow strips of wood onto the undyed wool.  After three dye baths.....this was the result.

Embellishing began with some simple straight line stitching using embroidery floss on the avocado sections, following by running stitches along the lines created by the hair clips.  Then the beads came out....


.....and then back to more embroidery....and finally the finished product is below......

STAIRWAY TO HEAVEN
11" x 8" 
Ready to hang or frame
Sorry you missed this one....similiar pieces are available
HERE


Tuesday, April 2, 2013

LIME-AID

My current in-progress project stack has included 4 different pieces.  This one was the subject of my blog in mid March....you can follow the progress here and next here and finally here.  Basically, I was on a roll and blogged about it for 3 days straight....then it got set aside.  

Since my sewing machine is still in need of repair, I directed my attention to the handwork finishing touches of this felted wool wall art piece. (I'll be making the 3 hr. round trip to Tennessee today to drop off my machine, oh don't we HATE to be w/o our sewing machines!!!)


LIME-AID  9" x 12"
Woolfelt (tm), machine stitched, agate & bead embellished

AVAILABLE HERE

Friday, March 29, 2013

MY STARS - COMPLETE

Yup....I changed the orientation of this piece again.....a true perk of working with these types of materials!  AND....fringe was added to the bottom....at first I beaded the length of strands to even out the bottom edge but on second look, I decided to go back and play off the quirky unevenness of the felted wool.

MY STARS   5" x 6"
Artist resist dyed felted wool, hand embroidered and bead embellished.
Ready to hang or frame.

AVAILABLE HERE   sorry it's now SOLD!


I'm linking to Nina-Marie's Off The Wall Friday...check it out.

Wednesday, March 27, 2013

MY STARS - PART 2

Because it's STILL snowing.....I'm NOT kidding either.....
the weather has allowed me to hunker down and get a lot of hand stitching accomplished.

In addition to the hand embroidery in the green sections, plus the beaded row surrounding the stars, the black background has been filled in with alternating rows of bugle/seed combinations and what I call 'washer/nut' motifs.

Next comes the finishing.....perhaps some fringe at the bottom edge...wherever that will be.  I've changed the orientation of the piece once already...from horizontal to vertical so let's see what happens......

Tuesday, March 26, 2013

MY STARS

The day we all dread......sewing machine failure.....has arrived.  The problem with needing a repair around here is distance....the closest repair guy for my machine is 3 hrs. round trip away.  AND.....a long wait......  So my activities will be geared toward handwork till I get this figured out.

 Of course I turned to the standby pile of resist dyed felted wool that I created a year ago.  I'm down to my last 3 pieces.  This is another tiny one.....about 6" sq.
 I've begun embellishing with some simple chicken hen embroidery type stitching in the green section.  Followed by a row of raised seed beads around the stars.  
The 'perfect' color beads in my stash are fairly uneven in size so this task is a tad frustrating as I need to resort the beads I pick up, trying to find uniformity which allows the rows of beads to sit better.

We are on our 2nd day of non-stop snow so since getting out of the house isn't happening today....I should be able to make nice progress....stay tuned.

Wednesday, March 13, 2013

LET THE EMBELLISHING CONTINUE....

There's very little free time this week......so the final embellishing of the agate slice is not moving along too quickly....but then again...this isn't something a gal can rush......stay tuned.....


Tuesday, March 12, 2013

LIME GREEN/GREY/WHITE COLORWAY

.....we left off yesterday with a nearly completed layout.....

 .....now I think I have the balance of scale and color appropriate for my design.
....and the beading to attach the agate slice begins.  Notice how the beads stacks echo the teeth of a zipper....  

....now it will be further embellished......

I'm anxious to finish....but life can be busy at times.....hope to post the finished piece in a few days.

Monday, March 11, 2013

THANK'S KIDS!!

A new project is underway and I have our son and wonderful DIL to thank for the color inspiration.  They lived in Portland, OR for a number of years which I suspect is behind the development of their personal color scheme.

I rarely work with a lot with greens, greys, & charcoal colors.  Not to mention lime greens!  But I love their decorating style, which is soothing and yet modern and fun. 

 So when I was searching for the right combination to create a small felted wool wall piece to highlight this beautiful agate slice....I found myself being influenced by the kids!

 A 'Woolfelt' heather gray 80/20 blend from National NonWoven's was my choice for the background.  The finished size was marked on my stabilizer which was then thread basted to the material.  Having a size reference (the thread basting) visible on the front of the fabric is helpful during the design process.

  A pile of potential felt was gathered.
......and some cutting and auditioning began....
.....and continued..... let's see where this takes me......

Saturday, March 9, 2013

FRAMED WORK FOR SALE

It's catching......it seems everyone I know is reorganizing their studios or doing some sort of spring cleaning......  So, not to be left behind, I have added a few more pieces to my 'shop' to find forever homes for the work.  

These aren't your colors??  Visit here and scroll through the list to see the wide range of wall pieces I currently have for sale.

 INFLUENCES 11" x 14"  © 2011
Artist screen printed linen fabric, coin & bead embellished, hand embroidered. Framed.


ONE WITH NATURE  21" x 17"   © 2011
Felted wool,machine stitching, embellished with found objects and beads, leaf stamping.  Framed. 

Thursday, March 7, 2013

NATURE'S WAY COMPLETED

The snow storm has kept me inside and my fingers flying!


 The fuchsia agate has now been stitched to the felted wool background and further embellished with tiny stones and glass leaf drops. I decided the background could use some additional texture with hand embroidery and a few more beads...the results are below.


NATURE'S HAND  9" X 10"  © 2013
Felted wool, hand embroidered, bead embellished agate
Available here
Detail