Tuesday, May 13, 2014

A NEW PHASE....

I'm new to grandma-hood.......one little glitch....our little guy lives on the West Coast......a minimum travel day by air of at least 10 hours.
 So, of course all gatherings are even more special.....and his 2nd birthday party was very special indeed.  The theme was 'farm'.....with all the touches my creative DIL and her parents could dream up.
 Activities for big and little people were found at every turn.  Here's a station where stickers, glue, and markers were used to make cards.
 I used metal animal shape cookie cutters to make P & J sandwiches.
 String cheese sticks and other individual treats allowed children to help themselves.
Animal cookies and cheese fish crackers add to the fun.
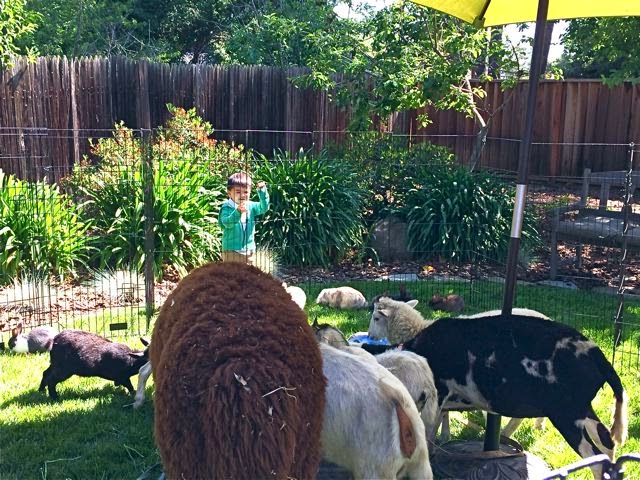
 The overall theme was built around a 2 hour petting zoo!  Now don't shake your head....I must admit I too was a bit apprehensive when I learned the plans.  Thinking it was a bit over the top, BUT....it was perfect.....so well done and everyone, large and small loved it. We all learned so much.

The 'team' arrived with rabbits, a tortoise, goats, sheep, chickens, and a lama.  Their pig was about to bring piglets into the world, so she stayed at home.


 Here's the birthday boy petting a rabbit.  All the animals were gentle, friendly, and the staff was incredibly professional and responsible.

 Because the weather was a little cool, the 'water' play station was filled with rice instead.  The kids loved it.
 Raiden and Grandpa H. were saying goodbye to the animals as the staff loaded them back into the van.
My nearly week long trip included a visit with my brother in Oregon, then onto San Francisco where the weather was the best I ever experienced there.....which included a birthday party and a Mother's Day celebration......growing older definitely has its perks.

Friday, May 9, 2014

SCARY PROCESS - HANGING QUILTS ON STAIRWAY WALLS!!

Even though I'm still away (lovin' on the grandchild).....I thought I'd drop in to share a problem that may be one you have too. How to hang a quilt on a stairwell wall....   As quiltmakers we all know it's a good idea to rotate our displays.  It's especially important to rest them if they are hand quilted and to prevent potential fading.
With that said....this batik quilt, made from vintage batik fabric that my MIL collected during their many visits to Indonesia has been up for quite awhile.  Like many mountain homes, we have vaulted ceilings....23 ft. tall at the highest point.

We found it was easiest to secure a quilt in a wooden hanging device, which has eye hooks that slip into skinny " L " brackets on the wall.  The whole thing can be lifted off, placed on the floor or a bed to remove the current quilt by sliding it out of the track and replace with a new one, and then lift it back into place.  

Frankly, I don't have the courage to get on the ladder where one end sits on the stairs and the other is leaning against the slopping wooden ceiling...but 'the husband' does.
 There will come a time when we'll have to hire someone to do this task, but for now.....we can enjoy another quilt design.  Yes, I really did do a lot of patchwork years ago.  This was made in 1992, machine pieced and hand quilted...74" wide x 102" tall.
This photo may provide a better perspective....the antique Hoosier cabinet looks like a salesman sample!

If anyone has tricks to share that are helpful for hanging quilts in stairways....do share!

Wednesday, May 7, 2014

FIBER JUNKIES - THREAD FABRIC

Our group, the Fiber Junkies, had planned to visit a discount fabric warehouse.....for what we call dumpster diving since most of the fabric is stored in huge cardboard boxes or bins. But at the last minute we learned the store wouldn't be open the date we wanted to go.

So....thanks to Kate, who organized two techniques for us to explore and Gen who offered her home....we still enjoyed an inspiring and fun day together.
 Kate brought ALL the supplies.....here's a pile of colorful silk roving.
 And print chiffon to use as a base for our project.
 Plus lots of other embellishments to add some pizazz.....
 Denny brought silk, I believe she called them 'silk handerchiefs'....basically it was thin felted silk roving that we pulled apart to incorporate into our creations. 
 Here's how you can create your own thread fabric......  Begin by protecting your work surface with plastic, cover with a piece of netting (which helps to add support as you work), next a layer of  chiffon (which is optional).  Now, using thinned white glue or matte medium and a stencil brush, secure thread/roving/& embellishments to the base in a pleasing manner. As you start, it can be a bit challenging to keep the threads in place...fingers help but they get sticky and fits of giggles are sure to follow when fingers begin to look like Chia pets. You can also work directly on netting if you prefer...which allows you to peel away the base to obtain a rather open layer of stiffen threads and roving fibers.  

I chose to work on a print chiffon (above) and plan to cut the piece into smaller segments for use in a future project.
 Apologizes.....I'm not sure who made each of these designs...but aren't they lovely?

FYI - My blog will be quiet for the next couple of days as I head off to the West coast to celebrate our grandson's 2nd birthday.  If you are a follower.....no need to do a thing.....as soon as I blog again....you'll automatically receive the post.  Thank you for spending part of your days with me. 

Tuesday, May 6, 2014

BLOOD, SWEAT & SIGNATURES - Quilt Celebrity Signature Wall Quilt

In the early 1990's I served as President of the North West Suburban Quilter's Guild (suburban Chicago).  To commerate the year, I collected the signatures of every guest speaker.  About that time, I too began to travel teach.  Thinking each engagement request was going to be my last (seriously...I couldn't believe my good luck).....I started asking my colleagues to sign muslin strips for me.

Amazingly, soon there were nearly 100 signatures which would have made for a HUGE quilt if set in the previously planned album block......meaning 1 patch per block!  After much time spent with graph paper and pencil.....a new block was born.  The AQS appraiser who appraised this quilt believes it is an original patchwork design.  For someone who really doesn't enjoy making patchwork quilts now.....I look back and am surprised at just how many I actually did make.

The name of this quilt describes:  BLOOD = hand quilting through cotton batting. SWEAT = the difficulty of developing a setting to include the entire collection. SIGNATURES = 96 signatures

I apologize for the quality of these photos.....certainly not a professional way to present the quilt.  My design wall is not large, and my lighting is inadequate, enough said! (Click on image to enlarge.)

Enjoy the sampling of quilt celebrity signatures featured in this wall quilt.  Numerous friends are no longer with us, making it even more special.
BLOOD, SWEAT, & SIGNATURES  66.5" x 66.5" -  Mary Stori  © 1992

Commercial cottons, hand quilted, featuring 96 quilt celebrity signatures.


Monday, May 5, 2014

PRINTING > SCREEN & TRANSPARENCY

Our small group, the Fiber Junkies is all about trying new techniques....earlier this year we worked with printing on transparency sheets and using a thermofax.  Sometimes we plan more than we actually have time to execute.  

I still had several designs from these two methods that needed to be printed....so today was the day! 
 The photo was printed on a sheet of transparency plastic....I blogged about our meeting here and here too.  I was worried that after more than a month sitting around, they might not transfer.
 Using some matte-medium covered rusted course cotton...... 
I placed one of my smaller images on the wet fabric and rubbed the plastic sheet with the back of a spoon....and yes.....it worked!!! 
 This one didn't transfer as well......I think I may have rubbed it more than necessary...blurring the center of the tractor grill.

Next, I pulled out the theromax screens we made at Judy's house with these images.
 This silk noil fabric was deconstructed screen printed....and probably not a very wise choice.  It was so nubby, none of my prints were very successful...but perhaps still usable.....
 Too little paint.
 Sort of okay.
Too much paint.

It's wonderful to have the opportunity to try new methods....it's a great way to learn what works with my style and temperment, also what techniques are not a good match for me.  So, I never consider disappointment a waste of time......it simply brings me closer to perfecting my own path!

Saturday, May 3, 2014

BLOGGER COMMENTS?????

Help!?!  I'm only getting about half the email notices I should when comments have been posted to my blog...though my settings appear to be correct.....  Anyone else having this issue or know a fix??  

I really appreciate hearing from you.  I like to respond to each of you in a timely fashion so this is annoying me.  

Thanks for your help.....

Friday, May 2, 2014

TRIO - COMPLETED NEW WORK

Gosh.....my life has been super busy lately but I am managing to finish up a few projects.....

 I blogged about this piece here.  Though machine quilting is low on my list of techniques I enjoy, there is a time and place for it in my work.  As the center was completed, it became obvious how much it enhanced this piece.

TRIO   27.5" x 18"
Artist hand-dyed cotton, commercial cottons, machine appliqued & quilted.
(Click image to enlarge)

Be sure to follow these links and check out what others have been up to this week  -   Off The Wall Friday   Whoop Whoop Friday   Finish It Up Friday

Thursday, May 1, 2014

MORE DYEING TECHNIQUES

We worked non-stop....we were on such a roll, we ate lunch standing up!!
 Kate shared a technique she'd previously done.....soda ash soaked fabric was folded and arranged in a microwave safe container.
 A small amount of dye was added and let to sit about a minute until it began to wick up the sides.
 Then another color was poured onto the top section.
                                        
 After microwaving......this is the result I got with a piece of wool.

 Kate also shared this method:  One end (about 1/3 of the total amount) of a piece of prepared fabric is positioned in a container and covered with dye.  After letting it sit for a minute or so, that section is pushed up to the far side of the container....then dye is poured onto the middle section which too is push up close to the first dyed section.  Finally the last third is dyed......  The container is covered and microwaved for 1 minute.
Aren't these great results of the 'smooching' technique?!?
 Between all these techniques we also began some ice dyeing.  It's fast becoming our favorite method.  I've blogged about this before so I won't go into the details again.....except to say this is a view of the fabric sitting on a rack which is placed over a tray.  Ice covers the fabric which is then sprinkled with powered dye.  (WEAR A MASK)  The whole package is covered with plastic and batched until the ice melts...
This is one of my ice dyed pieces, which I LOVE!!!

 And as I close this final report.....take a look at this lovely piece....it's my clean up rag.  We all had one the same size.....and challenged each other to use it in a project to be completed by our next 3 amigo get away.....date to be determined.

I hope you've enjoyed and have been inspired by our outing.....Perhaps it will encourage you to gather some pals and plan your own day of experimenting.