
I've been working on a project (for what seems like forever)......I'm hoping to put the final touches on it today and will then begin to share some process photos in the next few days.
In the meantime.....for the benefit of any hand quilters in the crowd, here's how I HAND baste my quilts in preparation for hand quilting.
 I rip the backing to measure at least 3" larger than the finished quilt top. Though in general, I don't like ripping for other tasks, for this process I want to work with fabric that will be on grain.
 The fabric is then folded in half and in half again.....marking the centers with a pin or a reference line along each edge. I also place the head of a straight pin in the center of the fabric, on the RIGHT side of the fabric.
Next, the backing is placed on my work table which is fitted with a gridded cutting mat, lining up the markings on the fabric edge with the appropriate lines on the table. This assures that the backing will be postioned straight on the work surface.....meaning ON GRAIN.
For quilts that are larger than the table top, I use bookbinder clips, available at office supply stores, to secure the backing to the table.
 For quilts that are smaller than the table, the backing is secured with painters tape.
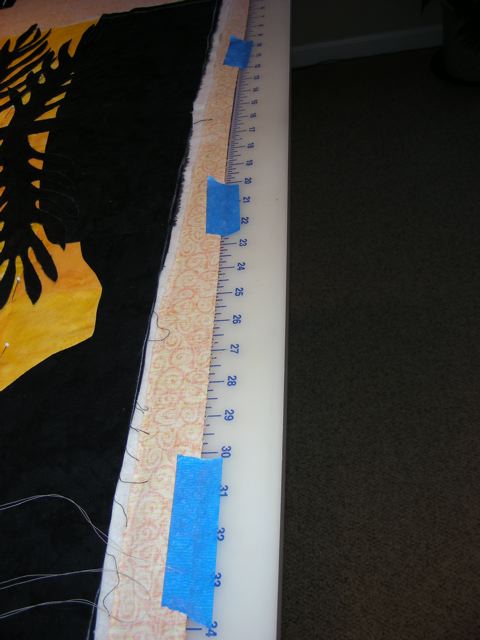 For quilts that are smaller than the table, the backing is secured with painters tape.
Next, the batting is placed on top of the backing....I cut the batting slightly larger than the quilt top.
Finally, the quilt top is positioned on the batting. I've marked the center of each edge and the center of the quilt and match those up with the backing's markings. Now the top and backing are both on grain.....this will help to avoid puckers and distortion during the quilting process which I ALWAYS do in a QSnap Frame.
 If the quilt top's construction has patchwork, I like to use a ruler to double check that the seams are straight.
Straight pins help to temporarily hold small adjustments in place and are removed as the basting is done.
 I always baste using cheap white basting thread....which seems to be harder and harder to find. Serger thread is a good substitute. Here's why......one never knows how long the quilt will sit around before all the hand quilting is complete....and we all know that the dyes of some threads are not always colorfast. Wouldn't you be bummed if the dye of that fuchsia thread you were trying to use up migrated to your fabric due to humidity? Believe me, in my judging duties, I've seen more than one quilt with tiny dots, left from basting threads.
It might seem awkward at first to use.....but try basting with a curved needle. One you get the knack of it, it's so much easier on the hands than stabbing and pulling a straight needle up and down through the layers. These needles are sold in a variety packet of different sizes. Since they are used for upholstery, you'll want to use the smallest one.
I don't baste 'pretty'.....but I do baste a lot, no less than 2" apart. Ya, I might begin basting in a grid pattern....but because my pieces are usuallyembellished, that format rarely works for the entire piece.
 Once the basting is completed, I turn the excess backing to the front, meeting the edge of the backing to the edge of the quilt top. Then I fold the fabric layers in half again, and baste together. This will keep the batting secure and the outside edges from unraveling.
Note: Because I was short of fabric for the backing in the photo above, I wasn't able to rip the edge......instead I had to trust that the selvage was true.
No comments:
Post a Comment