Showing posts with label wall art quilt. Show all posts

Monday, June 21, 2021

ADDING MOTIFS & ASSEMBLING

The process continues.......
The motifs are arranged with the aid of rulers.
 
All the motifs are arranged within the boundaries of the piece &  fused in place.
Appliqué begins using my documented machine settings. Each one is edged stitched to keep them flat just inside and outside the zig-zag stitching.
I'm a fan of pulling ALL threads to the wrong side and tying off. Lightweight stabilize was then removed.

 Fray Block is applied along the edges of the small lettering to prevent fraying.
The finished top is positioned on a canvas covered frame, wrapped and secured with staples.  A label is added and the unit is fitted into a shadow box frame.
Finally, the back cover of the frame is secured and another label added.

Please visit tomorrow to view the completed piece and see if your design guess is correct.

Sunday, June 20, 2021

NEXT A BACKGROUND IS CONSTRUCTED

The next step was to build a background for the motifs.

The color is actually ivory but I wasn't able to get the camera to believe it!  It consists of small patches of varying sizes.

I like to document the outside edge of the finished piece with basting to aid in positioning the motifs correctly.  Here it was done by machine, but most often I baste by hand.
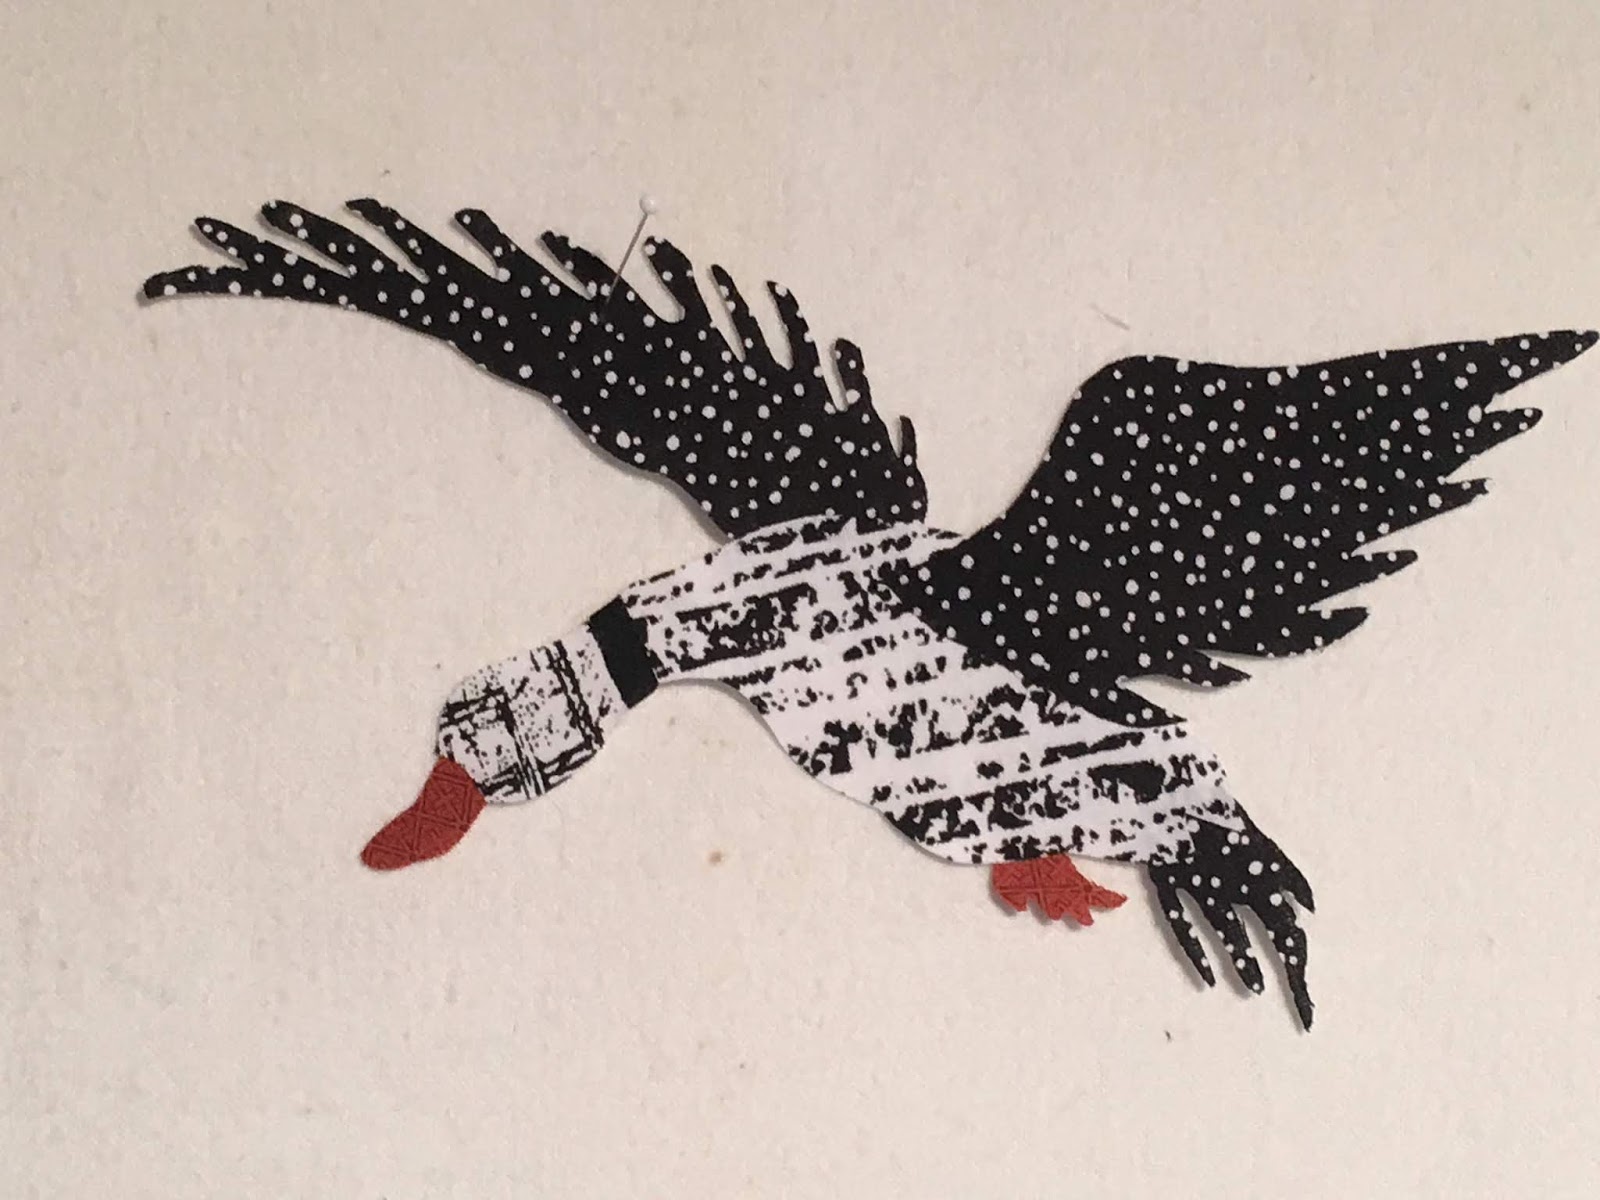
Another poor quality photo but perhaps if you squint....
I've cut a 12" square of batting and positioned on the wrong side...again with the aid of my pre-marked shape.  This piece will ultimately be attached to a canvas covered wood frame and set into a shadow box.  Because of the seam's bulk on the pieced top, the batting was eliminated in the areas that wrap around the canvas.
With the aid of a ruler and painters tape....I began to stitch straight quilting lines.
After only a few, I decided I didn't like it.....so out can the seam ripper.
Instead, random diagonal lines were used to provide more interest.

The next post will reveal the design (though you may have guessed the subject matter by now).  As usual, it's not a simple matter of just fusing....oh heck no.....I make it much harder for myself than that.....   See you soon.....


Saturday, June 19, 2021

TRY TRY AGAIN!

The process of creating what I thought would be a straightforward project has expanded.  So, rather than one long post, I decided to break it up into several which follows my previous intro post of this newest piece.

After the disappointment of not being able to get a useable print of the desired motifs on fabric....I began again.

Here's the rejected fabric that had been scanned from a laser print (without the offending lines in the black circles) into my computer, and then printed using my ink jet.  Notice the greyed background which was also reflected in the lettering.  Though the photo here looks like the circles are black, in person they are quite gray. Too gray for my purposes.
I went back to the computer and printed onto paper, more letters and symbols to be included in my piece.  They'd become templates...........
.......to trace in the REVERSE onto the paper side of Wonder-under that had been fused to a light colored batik. TIP - trace on the bias of the fabric to reduce frayed edges.  Each small piece would then be cut out and fused to a black circle.
Before proceeding with the step above, first I wanted to experiment to determine the color, size, density of the edge stitch I'd use to attach the back circles to the body of the quilt. Once satisfied with the results, they were documented along with the stabilizer I used.  It was retained for when I was ready for that step.

Are you getting any ideas of what these images will be???


Friday, June 18, 2021

2 DAYS DOWN

**  REMINDER - sign up using the form on upper right to subscribe to my blog, email notices will be sent each time I post from Follow.it.  The current Service, Feedburner will be discontinued by blogger at the end of the month......

So....what have I been doing  lately?  Well...... 2 days, 2 FULL dedicated days and a couple of hours today working on a new small art quilt.  I've been documenting the steps along the way to give readers an idea of just how long and involved creating one's own original art can take.  I'll publish them when the piece if complete.


However, this is an example of time that ended up not well spent!  I wanted to print some black circles with white lettering onto fabric.  Hair tearing time.....no matter what I did, I got these mystery white lines.  At first I thought my printer needed cleaning, which I did with no positive results.  However, when I printed it using my laser printer the lines didn't appear.  For some reason the ink jet printer (both 'the husband's & mine picked up these lines.  

I assume the lines came from the text box that was embedded onto the circle.  I even scanned a correct copy printed from my laser printer into my computer and then printed it on the ink jet.....no lines were visible then, but the black was very pale and the white was muddy.

I gave up on that approach and am now well on my way creating them another way.....stay tuned.....

Saturday, April 17, 2021

"PLAY TIME"

 Creating small silhouette art quilts continues to intrigue me. Here's my newest piece.

PLAY TIME SOLD

Art: 13.75" x 8" - Framed: 18" x 12".  

Artist's hand-dyed cotton, Ultra-suede, layered sheers, machine & hand appliqué, machine & hand embroidered, hand beaded. One-of-a-kind - Original design.

Saturday, June 27, 2020

FROM DEFEATED TO CONQUERED

After deep sixing my last project. I got back on the horse and started anew.

A very small thread sketched piece...drawn on tissue paper, taped to stabilized batik background. Stitching begins......


.......but a slight pause along the way to remove some of the paper to see the results. Happy, happy.

Thursday, May 14, 2020

BLUE HERON ART QUILT IN PROGRESS


This small piece continues to be developed.....as usual, changes are part of the process.

Tuesday, May 12, 2020

BACK IN THE GROOVE

Beginning....it will be a small piece mounted on a canvas covered frame.....lot's of work still to do.


Wednesday, May 29, 2019

SILVER DOLLAR PLANT

Yikes, I've hardly entered my studio for 2 weeks....we are knee deep in home projects.  You know....those annoying small tasks that are so easy to put off till one day you can't any longer.

But to prevent too much whining on my part, I did sneak in some time to begin a small wall art quilt.
I've started with a piece of white silk noil that had been accordion folded, tied, and soaked in iron water to add color and pattern.  I love the texture of silk noil and am always smitten by the warm color that iron water adds to fabric.
After stabilizing with a lightweight non-fusible, a few sparse branches were fused in place and secured with machine stitching.
 Two off-white sheer fabric layers have been sandwiched with fabric "seeds' and now placement auditioning begins.
More rearranging......when ultimately satisfied they will be secured using a blanket stitch and additional hand embroidery....and of course some background stitching.  Stay tuned...I'm headed to do some rug shampooing.....yuck!


Friday, March 8, 2019

PHOTO INSPIRED

My brother, his wife, and their grown children love the outdoors, especially the beach...whether that be in their home state of Oregon or their winter retreats in Mexico.  

A photo taken of their shadows as they strolled Sea Side Beach in Oregon inspired (with creative license) this wall art piece, recently gifted to them for their wedding anniversary.

'THEOBALDS AT SEASIDE BEACH' - 19" X 24"

Friday, February 1, 2019

INSPIRED BY A PHOTO

Quite some time ago my SIL shared a photo she took of her family strolling Sea Side Beach, Oregon.
 It's been in the back of my mind for a long time.....pondering about using some 'artistic license' to create a similar scene.
 As all of you quilters know.....it can take a surprising amount of time to find the right fabrics as one digs through their stash.
 And...just when you think you have.....you change your mind.
 Adding details/motifs can further alter your decision process.
But one keeps plugging away, adding - subtracting till the quilt gives the okay.  I'm NOT there yet (or should I say, my wall quilt hasn't given the okay). Do come back and see where this goes.

Linked to:  Nina-Marie's Off The Wall Friday, Sarah's Whoop Whoop Friday

Friday, November 30, 2018

MARSH AT DAWN

As mentioned on yesterday's post.....I'd cut a section from a larger hunk of ice-dyed silk noil for later use.  Well...I got to use it quicker than expected since the previous project was an utter mess.
The remaining piece is rather small, measuring only 21" x 15" which will become even smaller once it's squared and edges finished.  I created a larger 'marsh' themed piece last year that was the very first piece sold at my Arboretum exhibit, so I decided to experiment with a similar but different view.  

So far this is what I have.....as another idea began to brew....
I keep stumbling over my bin of black and white fabrics...it needs to find a good storage space, but my fabric closet is overflowing already.  Now this puny use of those fabrics won't reduce it by much, but this addition might be just what my little marsh piece needs.
I've never been all that keen about fusing......however, one must keep construction time in mind when pricing quilts for sale.  Fusing is such a time saver over hand appliqué.  Each section is separate and for the time being, just tacked together with a bit of glue stick until it's time to add it to the piece.

Stay tuned....and check out what other artists have worked on during this very busy past holiday week:  Nina-Marie's Off The Wall Friday, Sarah's Whoop Whoop Friday.