Friday, January 4, 2019

FIBER JUNKIES - JAN. 2019 MEETING

For our first meeting in 2019 we concentrated on increasing our personal silk screen inventories by creating our own.  We call these "Denny's silk screens" as an homage to her creative method of fast and easy screen making.

The supplies are readily available, here's our stock pile of inexpensive plastic window screens where the screening and gaskets have already been removed.
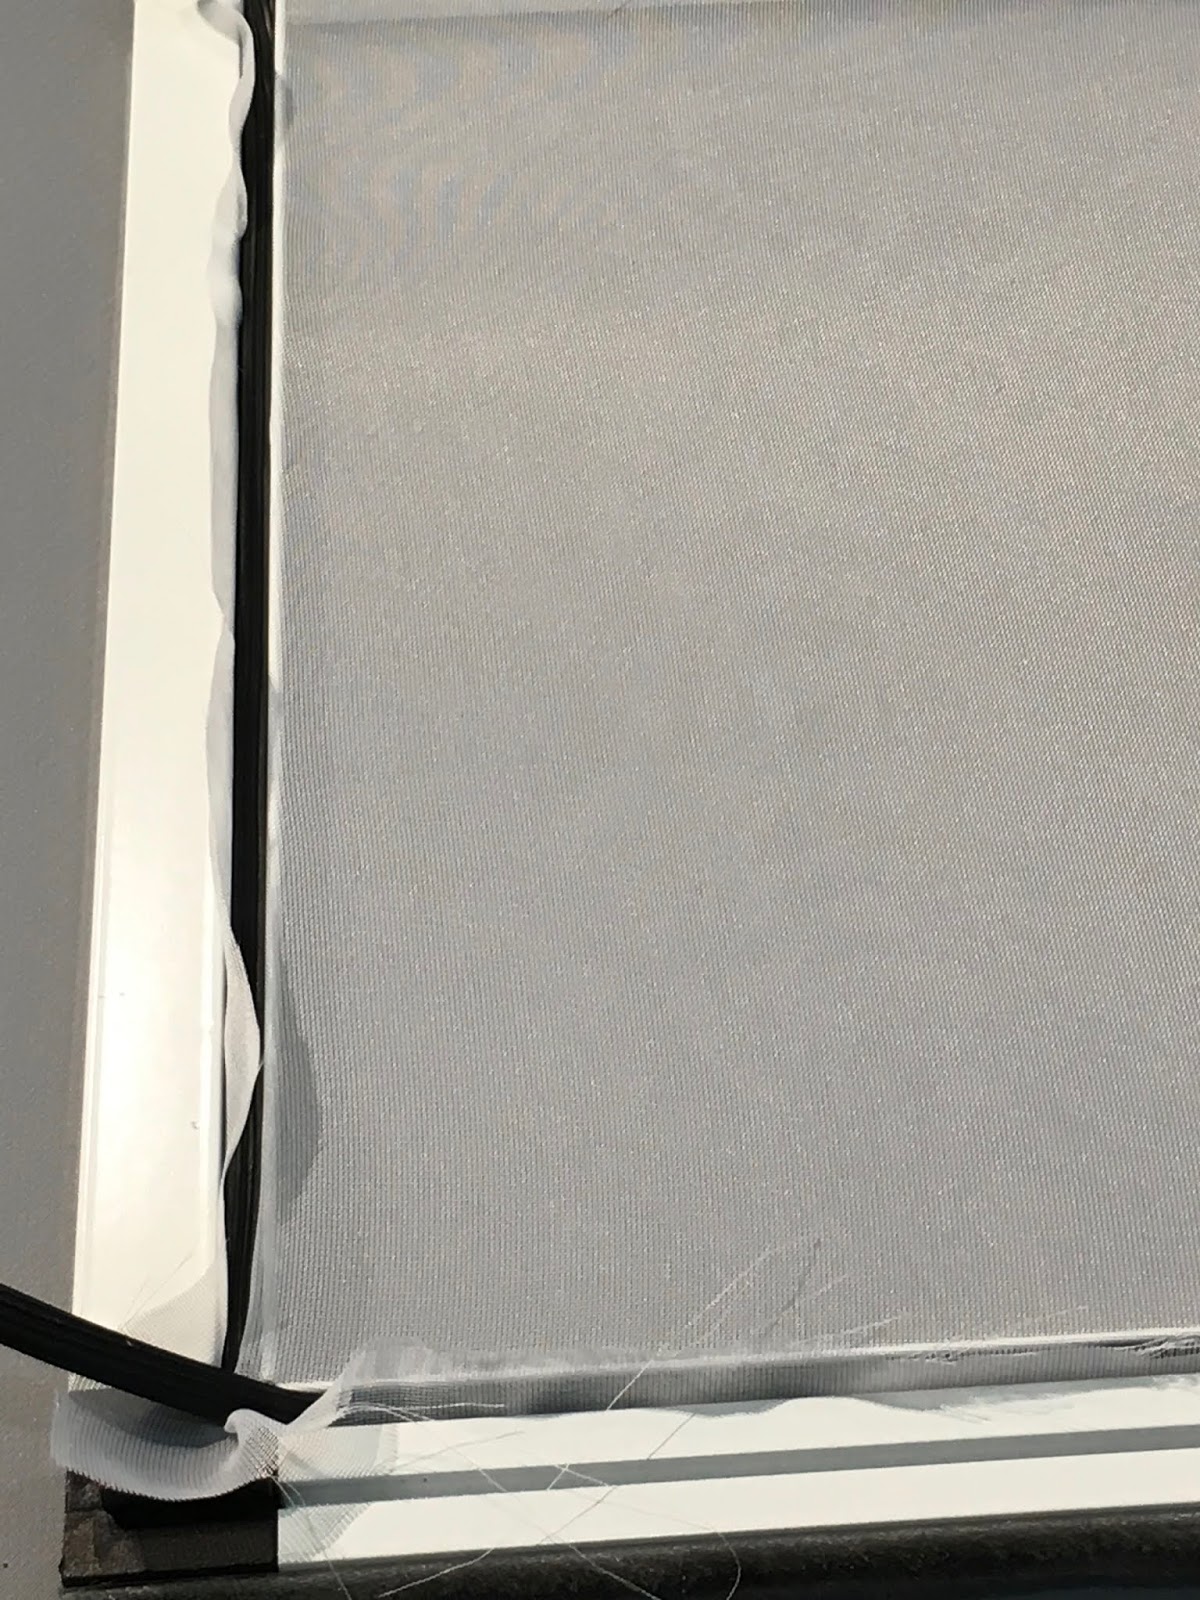
The process is simple.  Begin with a new inexpensive plastic screen, remove the rubber gasket (spline) that holds the screening in place.  Save the screening for other uses....(as a mesh on a quilt, or for mono printing, or ???)
 Cut a piece of organza or sheer fabric slightly larger than the frame.
 Carefully push the gasket back into the channel, keeping the fabric as taut as possible as you work your way around the frame.
 You may or may not have a little extra when you reach the starting point. 

Use a screen roller tool to firmly secure the gasket/spline, making sure the fabric is as tight as possible. This very inexpensive item (blue tool above screen) is available at any hardware store. 
Next you need to protect the edges of the screen from the dyes/paints that would inevitably collect there as well as helping to better secure the screen from slipping out of its track.  

Start by cutting a small piece of duct tape, cut that in half, nearly to the top and position in each corner as shown. To better identify the owner of the screen, we each used different colors of duct tape.
Run duct tape from the outside edge of the frame onto the screening, do all four sides.  Flip the screen over and repeat.  We like to run an extra piece of duct tape along the edge of what will be the top of the screen which acts as the 'well' where the dye or paint is initially introduced to the screen.  It can be placed as deep into the screen as you wish, we place ours about 1+ inches lower than the inside frame of the screen...increasing that taped section to measure about 3+ inches (outside frame edge to screen)

 My two finished frames......having different sizes is helpful when printing.
Though time was getting short, we each made a temporary screen by cutting a design into iron on clear vinyl, adhering it to sheer fabric and adding duct tape to the edges.  It's a handy way to create a 'one-off' design.  My goal is to eventually screen print this 'shadow motif' of family members at a beach.
 We will be making more next month....and I'll provide better details, but here's an overview of the process:    1.  select a design as I did above 2. trace to the paper side of iron on clear vinyl 3. cut out, either as a mask or stencil. My small 'shadow' design was poorly chosen given the long narrow pieces that kept sticking to themselves.  
I had a heck of a time arranging it on the slippery sheer.  Eventually I pinned the sheer to the surface of a padded ironing board cover. But I still spent way too much time trying to get the cut out flimsy stencil to lay flat and secure.  But once it was, the design was covered with parchment paper and heated with a warm iron to permanently bond the vinyl and sheer together.
 All that was left to do was trim the edges evenly and cover with pieces of duct tape.
 
Kate wisely remembered to use the colored markers she brought to outline and scribble on the vinyl side before cutting out her shape. Adding color is so helpful when it comes to arranging the cut out stencil onto the sheer.  Note to self - next time don't be in such a hurry...remember to color the vinyl!!!

If you aren't a regular subscriber to this blog, you can do that now by using the link on the side bar......that way you'll never miss any advetnures of the Fiber Junkies!

Here are other links to check out today:  Nina-Marie's Off The Wall Friday, Sarah's Whoop, Whoop Friday.


Wednesday, January 2, 2019

DAY ONE - 2019

What a great way to begin 2019.......finishing a condo-warming couch quilt gift for a family member while binging on a Netflix series.  

AND...a reminder to self - DO NOT attempt to quilt anything this large on your home sewing machine again!!  It's very possible I've dislocated my shoulder......grinning......


Monday, December 31, 2018

FAREWELL 2018

Many bloggers use this last day of the year to reflect on the work accomplished in 2018......I choose to look forward by wishing you CHEERS TO A NEW YEAR!

THANK YOU FOR BEING MY BLOGGER FRIENDS!


Sunday, December 30, 2018

PUTTERING RESULTS

All my preparation translated into fairly fast sewing.  Of course the rows have to be assembled, layers sandwiched, and then the dreaded machine quilting tackled....

BUT....ONE STEP at a time helps to make it an enjoyable experience...oh except for the machine quilting part.  This piece got bigger than I originally planned.....about 65" x 75", so I know I'll be struggling on my home sewing machine.  (Character building!!)


Friday, December 28, 2018

PUTTERING - COUCH QUILT IN PROGRESS

I'm just puttering away the last days of 2018, making a couch quilt as an Arizona 'condo warming' gift for a family member.  
 I tend to break up the tasks of making pieced quilts into smaller segments. Piecing is not my preferred construction method so this approach is less overwhelming and works best for me.  My first step was to pull desert sunset colors from my stash and begin to cut the finished 10.75" blocks.
Despite the simple design, after making a few blocks I found it too time consuming to think about what colors and what pattern would be suitable for each one.  So I decided to cut each background square first...choosing the colors as needed as they were arranged on the design wall. 
After all the squares were cut, I only needed to concentrate on what colors the strips would be for each one.  So at Step Two: nearly all the strips are cut and paired with their specific block.  

On Step Three:  I'll decide the placement and sew the strip/strips into each block, keeping in mind the look of each surrounding block.  Yup, there's surely a faster way to work, yet this pre-planning way of construction is what works for me.

Come back won't you to see how this all comes together.

Also check on those dedicated stitchers who had time to work on projects this past week by visiting:  Nina-Marie's Off The Wall Friday and Sarah's Whoop Whoop Friday.


Monday, December 24, 2018

MERRY CHRISTMAS

MERRY CHRISTMAS........ Thank you for following my fiber adventures. Have a safe and wonderful holiday.  I'll see you soon again in 2019!

Wednesday, December 19, 2018

THROUGH THE TREES

This little piece has been on and off my design wall for several months....I couldn't decide if it was finished or not.  But this week after the addition of hand embroidered foliage at the lower level and a resolution of how to finish the outside edges, I called it finished.  
THROUGH THE TREES - 15" X 20"
Copper foiling on felted wool, machine appliqued, hand & machine embroidered.
DETAIL

Friday, December 14, 2018

OFF THE BEATEN PATH - WALL QUILT

The roads are still somewhat iffy around here, especially early mornings and later in the day when temperatures drop and the snow melt turns to ice.  So...what's a gal to do.....be smart, be safe, stay in studio and finish the last quilt of 2018!
 After much indecision over the most artful direction to showcase my digital prints of interesting subjects found as I hiked and drove around our rural mountain areas in Haywood County, NC. I used a variety of green batiks to surround each print.  Once positioned on my design wall, I found the white background really helped to highlight the images.
Using a cotton print that appears to be "peeling paint"....I set about piecing this puzzle arrangement together.  It took way more time than it should....but that's me....patchwork and math can befuddle me.  But I'm happy I took the time to make it work.
OFF THE BEATEN PATH  - 41" x 34.5"
Artist's photos printed on cotton, machine stitched and heavily quilted.

 I LOVE this photo.....this car was located about a 10 minute walk from our house on Balk Creek Road in Upper Crabtree, NC.  Obviously it had been there for years.  About 3 years ago someone bought the property and removed, YES...removed it.  Too bad.....
 Photo taken at PTA member Dort Lee's property in Sandy Mush......

Visit these sites to see what other artists have had time to work on during this busy holiday season:   Nina-Marie's Off The Wall Friday  and Sarah's Whoop Whoop Friday.

Wednesday, December 12, 2018

OFF THE BEATEN PATH IN OUR MOUNTAINS

Our bad weather is keeping me firmly planted in my studio and with any luck....I'll come up with a design to utilize the many photos I've printed onto fabric of the hidden treasures found during our hikes/walks here in the very rural NC mountains.
 I just love these images and of course wish to highlight them as artfully as possible....so out comes some fabric colorway choices.
 Or...maybe I'll combine them.
Or....perhaps even go a completely different route......please do come back and check out my decision.

Monday, December 10, 2018

FIBER JUNKIES DECEMBER MEETING

We marked another year of fabulous Fiber Junkies gatherings at Gen's house with our annual Christmas party.  As usual we began with Show and Tell.
 Denny continues with a mind boggling amount of quilt making....LARGE pieces I might add.  Here's another beauty that has been colorfully pieced and appliquéd.  She's certainly perfected both skills.
 She also completed an ethnic quilt....it was such a pleasure to examine the variety of fabrics and patterns she selected to incorporate into this thoughtful piece.
 I especially love this center block representing cotton fields.
 But NO...she didn't stop there....she pieced the backing and assembled in the lap-quilting method.
 Susan made a table runner....that is so much lovelier than my photo shows!
 Gen is still smitten with paper and is having fun using a variety of pens and inks to create these detailed cards. 
 We love them too and howl at the clever and profound words!
 Denny treats us every year to the most beautiful and delicious Yule Log.  Believe me.....if we didn't know how yummy it was, we'd have a difficult time cutting into the masterpiece.  Denny kids us about the hours it takes to make it....but confesses, it's purchased at a bakery in Greenville, SC.

To start off our pot luck, along with some festive bubbly (our adult beverage of choice for this group), I made herb goat cheese stuffed dates.  A good pal (thank you Lynn) gifted me some Palestinian Medjoul dates purchased on her recent trip to the Holy Land.  They are said to be the best in the world, and I'll vouch for that!

Our meal was beyond delicious.....we all happily groaned as we tried to stand up!!
 Our annual gift exchange is always so special.  We each bring a wrapped gift.....can be homemade or not.  We draw numbers to determine the order of selecting a gift.....one can select an wrapped gift OR steal from someone who has already opened one.....such fun!!
 I was so excited to open this gift....but darn it...Gen decided to steal it from me....not to worry......

.....I then took this Prima color pencil set and one of Kate's handmade book covers from Denny!
Denny's contribution was a book that was enclosed in a lovely silk noil paint surface designed bag.  She used a metal ruler for the snap closure.
Kate was thrilled with her gift.....hand knitted fingerless gloves made by Gen.

This is the only meeting all year where we don't concentrate on fiber experiments....instead we spend time making a list of 'goals' that we'd like to explore in 2019.  Hard to believe I'm typing 2019...where did 2018 go??

Many of you readers tell me you enjoy the adventures of the Fiber Junkies....I thank you for words of encouragement.....we will be back in Jan. with more fun ideas to share with you.